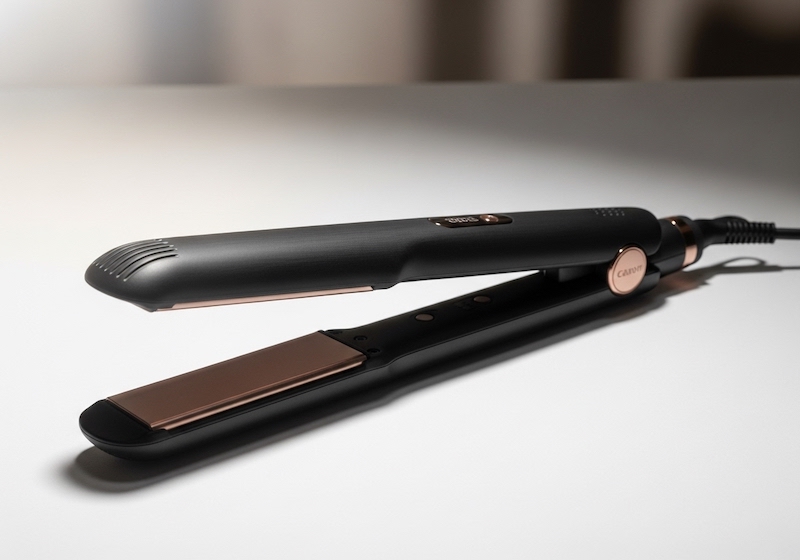
Creating salon-worthy hairstyles at home while keeping your hair healthy isn’t just a dream – it’s an achievable skill that comes down to understanding the fundamentals of heat styling and choosing the right approach. Modern equipment has revolutionized home styling, with innovative tools like a hair styler offering both curling and smoothing capabilities in a single device, making it easier than ever to streamline your routine. But here’s the thing: no matter how advanced your tools are, mastering proper techniques and putting hair health first will make all the difference in your long-term success.
Understanding Hair Anatomy and Heat’s Impact
Before you can style effectively, you need to know what you’re working with. Think of your hair as having three distinct layers: the cuticle acts as a protective shield on the outside, the cortex houses the protein bonds and pigment that give your hair its strength and color, and the medulla forms the innermost core. When you apply heat, it temporarily breaks the hydrogen bonds in the cortex, which is what allows you to reshape your hair. The problem comes when you use too much heat – this can permanently damage the cuticle and break down those essential keratin proteins.
You’ll know when heat damage has occurred because your hair becomes dry, breaks more easily, develops split ends, and loses its natural shine. Understanding the difference between heat conduction (when your hair touches a hot surface directly) and convection (when heated air circulates around your hair) helps explain why some styling tools are gentler than others and why your technique matters just as much as the temperature you choose.
Essential Preparation Steps Before Heat Styling
Great heat styling starts long before you pick up any tools. Begin with the right shampoo and conditioner for your hair type—fine hair thrives with lightweight formulas, while thick or curly hair needs richer moisture. Heat protectants aren’t optional; they’re essential. Look for products with silicones or heat-resistant polymers that create a protective barrier around each strand.
Work the protectant through damp hair, making sure you coat everything from mid-length to the ends evenly. When drying, pat your hair gently with a towel instead of rubbing vigorously, which can create friction damage. Use a wide-tooth comb to detangle, always starting at the ends and working your way up to avoid unnecessary breakage.
Core Heat Styling Techniques for Different Looks
Straightening for Sleek Results
Getting truly smooth, straight hair comes down to patience and precision. Work in horizontal sections that are no thicker than an inch—this ensures even heat distribution. For thick hair, set your tool between 350-400°F; for fine hair, stay in the 300-350°F range. Make one smooth, steady pass from root to tip without going over the same section twice, which can create hot spots and damage.
Curling and Waving for Volume
The size of your barrel determines how tight your curls will be—larger barrels (1.5-2 inches) give you loose, flowing waves, while smaller ones (0.75-1 inch) create more defined curls. Wrap your hair around the barrel away from your face, hold for 8-12 seconds depending on how thick your hair is, then release the curl into your palm and let it cool completely before gently brushing it out.
Versatile Multi-Function Styling
Today’s styling tools often do double duty, seamlessly switching between straightening and curling functions. While this convenience is appealing, these tools require careful temperature control and a shift in technique when you change modes. Start with lower temperatures as you learn how your hair responds to different styling methods.
Maintenance and Recovery for Sustained Hair Health
What you do after styling can make or break both your look and your hair’s health. Let your hair cool completely before you touch it, then use a natural bristle brush for final smoothing. A light application of hair oil can seal the cuticle and add shine—just focus on the mid-lengths and ends to avoid weighing down your roots.
Make deep conditioning treatments a weekly ritual, and don’t skip regular trims every 6-8 weeks. Give your hair a break with heat-free styling days whenever possible. Pay attention to what your hair is telling you—if you notice more tangles, dullness, or breakage, it’s time to dial back the heat or adjust your technique.
Building a Personalized Heat Styling Routine
Every head of hair is different, so your styling routine should be too. Try a simple porosity test by dropping a clean strand into water—if it sinks quickly, you have high-porosity hair that needs extra moisture; if it floats, your hair has low porosity and benefits from lighter products.
Think about your lifestyle when creating your routine. If you style daily, you’ll need to use lower temperatures and be extra diligent about preparation. Occasional styling gives you more flexibility to use intensive techniques. Always start conservatively with both temperature and timing, then gradually adjust based on how your hair responds.
Thoughts on Timeless Hair Care
Mastering heat styling is really about blending science with skill. The fundamentals never change: thorough preparation, proper technique, and consistent recovery care. When you build these habits into your routine, you’ll gain confidence in your styling abilities while keeping your hair healthy for years to come. Don’t be afraid to experiment within safe limits, keep track of what works for your hair, and be willing to adjust your approach as you learn what gives you the best results.

Monica Costa founded London Mums in September 2006 after her son Diego’s birth together with a group of mothers who felt the need of meeting up regularly to share the challenges and joys of motherhood in metropolitan and multicultural London. London Mums is the FREE and independent peer support group for mums and mumpreneurs based in London https://www.londonmumsmagazine.com and you can connect on Twitter @londonmums
